Install
LatchAI runs from a clone of the repository: the engine and the workbench, from source. A packaged macOS desktop app — signed, notarized, self-updating — is built from that same source. Everything on this site describes LatchAI as it is in the repository.
Nothing you create ends up inside the clone. Every agent, workflow, and transcript lands in the LatchAI home, a directory you own, so pulling a new version never touches your work.
From a clone
Section titled “From a clone”LatchAI is a TypeScript monorepo. Three packages — packages/schema (the graph JSON and
event types), packages/engine (the daemon), packages/sdk (the code-first workflow
builder) — and five apps: apps/ui (the workbench), apps/desktop (the Electron shell),
apps/mobile (the phone app), apps/browser-extension
(the Chrome extension behind browser automation),
and apps/relay (the blind relay service). The engine runs straight from source with
tsx, so there is no build step for it; only the UI bundle is built, and only when you
want the desktop shell or the engine’s own origin.
Prerequisites
Section titled “Prerequisites”Node, npm, and git. The repo’s .nvmrc pins Node 24 — that is the version to use.
The root package.json declares "engines": { "node": ">=22.5" }, so 22.5 will run the
engine, and the packaged desktop app carries its own Node 24 inside Electron 44 regardless
of what you have installed.
The repo uses npm workspaces, so a single npm install at the root installs everything.
macOS gets three things for free: secrets in the login Keychain, the launchd integration
described in Run LatchAI as a service, and a native folder
picker when you add a mount. Elsewhere, secrets fall back to a
0600 JSON file in the home, the folder picker falls back to typing a path, and there is
no service integration — the engine itself is plain Node and has no macOS dependency.
Clone and install
Section titled “Clone and install”git clone <repository-url> latchai # TODO: public repository URLcd latchainpm installnpm install also runs a small postinstall script that renames the development Electron
bundle to “LatchAI” so npm run desktop doesn’t say “Electron” in the menu bar. It is
macOS-only, exits quietly everywhere else, and is allowed to fail harmlessly.
Start the engine and the workbench
Section titled “Start the engine and the workbench”The engine is the daemon; the UI is a Vite dev server that proxies /api, /events, and
/term to it. Run them in two terminals — the engine first.
npm run engine # daemon on :7777 (HTTP API + WebSocket event stream)npm run ui # workbench on :5173The engine’s first run creates and seeds the home, then tells you what it opened:
[latchai] seeded 12 widget type(s) into /Users/you/LatchAI/widgets[latchai] initialized home at /Users/you/LatchAI[latchai] mobile: http://127.0.0.1:7777/m/?token=xqkSh2_wPYI9havo1v3qPLLoGSvA9RwL[latchai] mobile: loopback-only right now — set LATCHAI_BIND=0.0.0.0 (behind Tailscale, never an open port) to reach it from a phone[latchai] engine on http://127.0.0.1:7777 (provider: mock)mock is the offline canned provider — that is what a fresh install with no
latchai.config.json resolves to, and it is what onboarding replaces in a moment. Open
http://localhost:5173 once Vite is up.
Two other things start alongside it. The /m/ line is the phone app, served by the engine
itself; see The phone app for pairing and for why the token is
in the URL. And unless you have turned it off, the engine opens its
OpenAI-compatible gateway on 127.0.0.1:7778,
so other tools can call the models LatchAI has.
The engine binds 127.0.0.1 and rejects non-local Host and Origin headers on both HTTP
and WebSocket, so nothing on your network can reach it by default. LATCHAI_BIND overrides
the bind address — the one real reason to is reaching the phone app from a phone, and the
boot log says so. Put it behind a private network; never open the port.
The desktop shell from a clone
Section titled “The desktop shell from a clone”npm run desktop # builds the UI bundle, then launches ElectronThe window is the workbench; closing it leaves LatchAI running in the menu bar, so triggers keep firing. The menu-bar icon offers Open LatchAI, Restart Engine, Check for Updates…, and Quit — which stops the engine too.
You can also skip Electron and use the engine’s own origin in a browser:
npm run build:ui # writes apps/ui/dist…then open http://127.0.0.1:7777 with the engine running. No Vite, no proxy.
npm run mobile does the same for the phone app — a Vite dev server on :5174, proxying
to the engine — when you are working on apps/mobile itself rather than using the copy
the engine already serves at /m/.
The packaged desktop app
Section titled “The packaged desktop app”The packaged build is a signed, notarized macOS app that carries its own engine, UI bundle, skills, and phone app inside it. Two things about it are worth knowing before you run one:
- It requires macOS 13 (Ventura) or newer. The 0.9.0 release moved the shell to Electron 44 to get back inside Chromium’s security-support window, and Electron 44 does not run on macOS 11 or 12.
- It updates itself. Since 0.7.2 the app downloads updates in the background and
installs them on quit, and writes an
updater.login its data folder so a failed update is diagnosable. Builds at 0.7.1 and older had a bug that froze the installer, so a copy that old has to be replaced by hand once before automatic updates start working.
This site links no download.
First boot
Section titled “First boot”Onboarding runs in two steps the first time the workbench loads.
Step one picks the LatchAI home — the directory that will hold your agents, workflows,
workspace, and run history. It defaults to ~/LatchAI. Keep this location moves on;
Choose a different folder… opens a native picker and relocates the freshly seeded home.
Relocating exits the engine on purpose, so the desktop app respawns it while onboarding
polls for it to come back; with a terminal setup, restart npm run engine yourself. See
Moving the home.
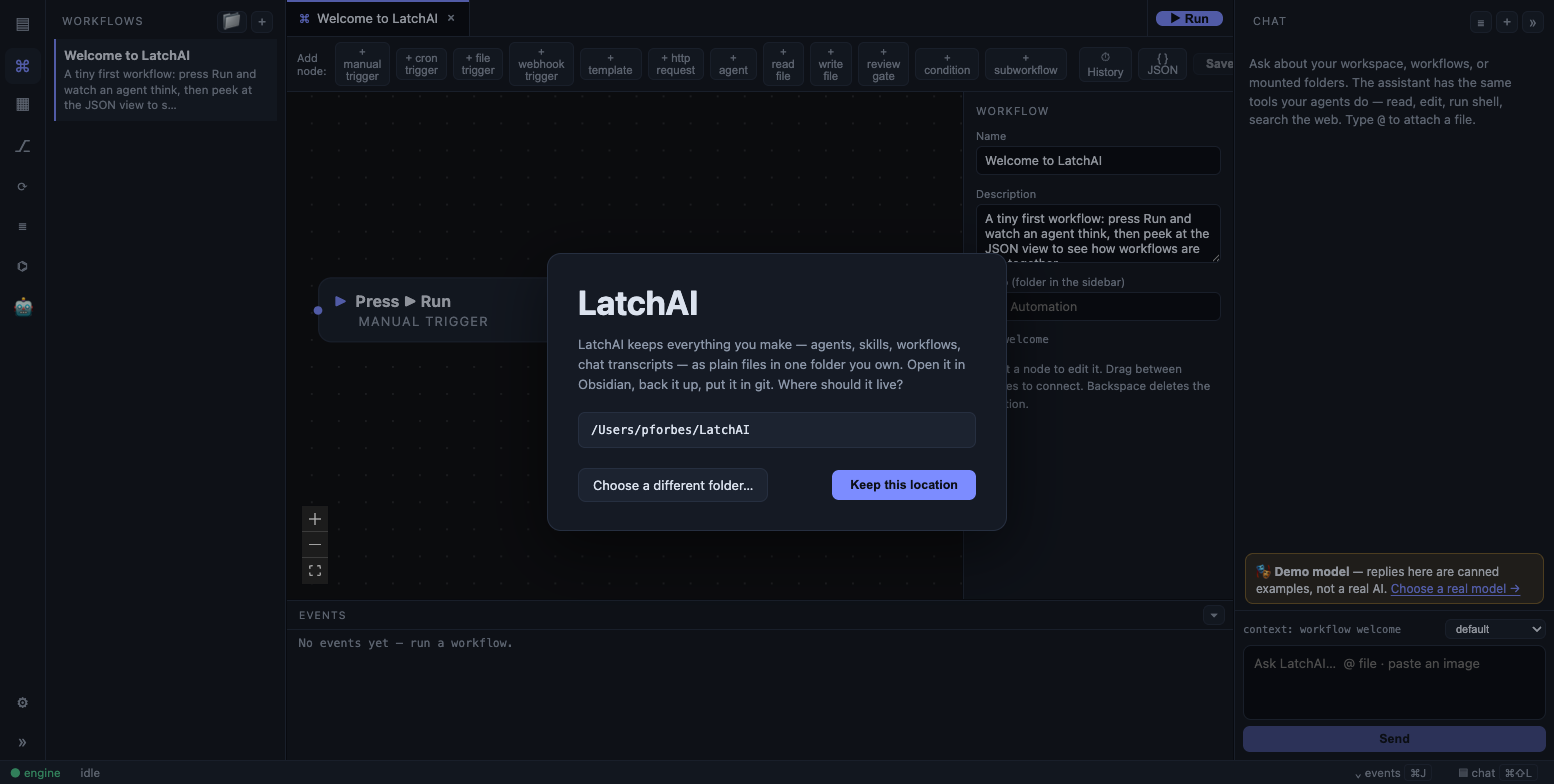
Step one of onboarding: where the LatchAI home lives.
Step two picks a model. ★ Run on this Mac reads the machine’s memory and picks a
starter — Qwen3 4B with 16 GB or more, Qwen3 1.7B below that — then asks the engine
which quantization actually fits and shows you the download size before you commit.
Download & start kicks the download off and drops you into the app; progress lives in a
status-bar chip, and until the weights land, chat answers with a clearly-labeled canned demo
model. Local hosting needs the llama-server binary — see
Getting the llama-server binary.
Prefer a model you already run elsewhere? Presets for OpenAI, Anthropic (Claude), Local
(Ollama), and Custom (OpenAI-compatible) fill in the fields. Test connection sends
one tiny completion and reports either ✓ Connected — <model> replied in <n>ms or a
specific failure (could not reach …, authentication failed — check the API key,
endpoint reached, but model "…" was not found). It never blocks you: Start using
LatchAI saves regardless. The API key you type is written to the
secret store, not into latchai.config.json.
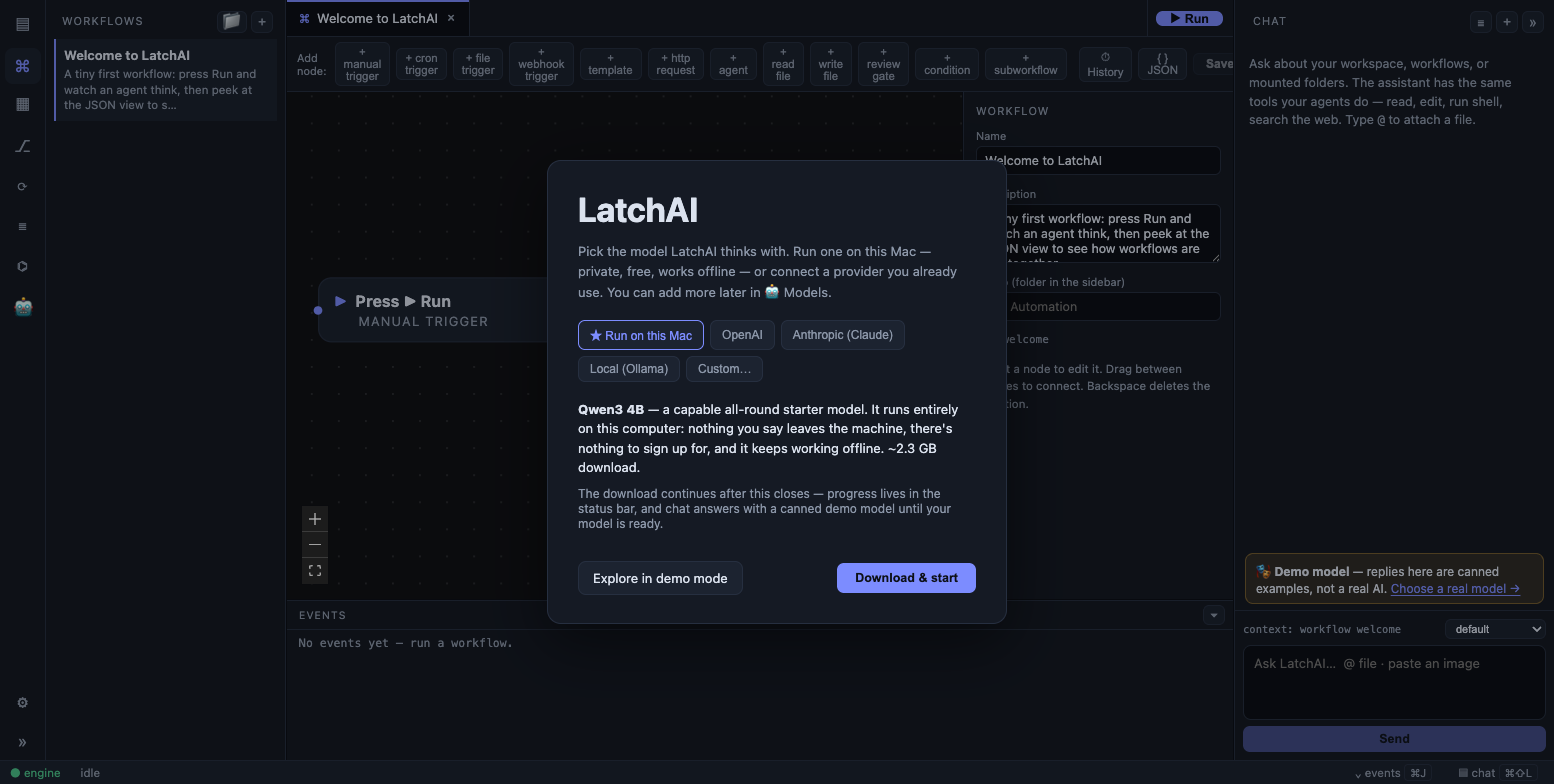
Step two: run a model on this Mac, a provider preset, or demo mode.
Explore in demo mode dismisses this step and leaves LatchAI on the offline mock model — everything stays clickable, and chat shows a banner saying replies are canned examples. The Models page connects a real one later.
After onboarding, the home holds a starter agents/assistant.md, a workflow-builder
agent that can author workflows for you, a workflows/welcome.json you can run
immediately, the twelve seeded widget types, and a dashboards/morning-briefing.md brief.
The LatchAI home walks the whole directory.
Run a workflow headlessly
Section titled “Run a workflow headlessly”No UI required:
npm run run ~/LatchAI/workflows/welcome.jsonEvents stream to stdout — one line per event, with agent tokens printed as they arrive:
[19:04:11.281] run.started[19:04:11.283] node.started trigger[19:04:11.284] node.completed trigger (9 chars)[19:04:11.286] node.started helloHi — I'm LatchAI, a local-first AI automation workbench…[19:04:13.902] node.completed hello (214 chars)[19:04:13.903] run.completedTrailing arguments join into the optional run payload that a manual_trigger exposes as
{{trigger}}. This is a fresh process each time, so it always runs the engine code
currently on disk, and since 0.9.3 it drains its JSONL run log before exiting — the file
on disk ends where the output did.
The same CLI has two more verbs worth knowing: tools lists every registered tool
(built-ins plus whatever your MCP servers contribute), and
daemon install | uninstall | status manages the launchd service described in
Run LatchAI as a service.
npx tsx packages/engine/src/cli.ts toolsTroubleshooting
Section titled “Troubleshooting”Something else owns port 7777. LATCHAI_PORT moves the engine:
LATCHAI_PORT=7800 npm run engine. Pick something other than 7778, which the
OpenAI-compatible gateway already uses. Only the engine reads the variable — npm run ui’s
dev proxy and the desktop shell both target 7777 — so with a moved port, use the engine’s
own origin (npm run build:ui, then http://127.0.0.1:7800) or the CLI.
The workbench says “engine offline”. It retries on its own with backoff and catches up on whatever it missed once a socket lands, so a daemon restart — including the one onboarding causes when it relocates the home — resolves itself. The status bar says “connecting…” until an attempt has actually failed. If it stays offline, the engine really is down: check the terminal it was running in.
- The LatchAI home — the directory layout you just created.
- Models — local models, connected providers, the OpenAI-compatible API, and embeddings.
- Your first project — mounting a repo you actually work in.